


How To Tornado-Proof Windows Dallas Before May
How to Tornado-Proof Windows Dallas Before May As spring unfolds in North Texas, the threat of severe weather—including violent tornadoes—becomes increasingly real for residents of Dallas and its surrounding suburbs. With tornado season peaking between April and June, homeowners must act decisively to protect their properties before the first major storm hits. One of the most vulnerable points in
How to Tornado-Proof Windows Dallas Before May
As spring unfolds in North Texas, the threat of severe weatherincluding violent tornadoesbecomes increasingly real for residents of Dallas and its surrounding suburbs. With tornado season peaking between April and June, homeowners must act decisively to protect their properties before the first major storm hits. One of the most vulnerable points in any home is its windows. Broken glass, pressure differentials, and flying debris can turn a routine storm into a life-threatening emergency. Tornado-proofing windows in Dallas before May isnt just a precautionits a critical step in safeguarding lives, minimizing property damage, and reducing recovery costs. This comprehensive guide walks you through every actionable step to secure your windows, from assessing risk to installing proven protective systems, all tailored to the unique weather patterns and building codes of the Dallas-Fort Worth metroplex.
Step-by-Step Guide
Step 1: Assess Your Homes Vulnerability
Before investing in protective measures, you must understand your homes exposure. Dallas lies within Tornado Alley, where wind speeds can exceed 200 mph in the strongest storms. Start by identifying which rooms have windows facing prevailing storm directionstypically from the southwest. Use free online tools like the National Weather Services storm history maps to review past tornado paths near your ZIP code. Homes built before 2000 are especially at risk, as older construction often lacks impact-resistant glazing or reinforced frames. Check for single-pane windows, cracked caulking, or loose frames. These are indicators that your windows are not storm-ready. Create a home inventory: photograph each window, note its dimensions, material, and age. This will help you prioritize upgrades and estimate material needs.
Step 2: Understand Local Building Codes and Insurance Requirements
Dallas follows the International Residential Code (IRC), which has adopted updated wind-load standards since 2018. Homes in high-risk zones (such as parts of Collin, Denton, and Tarrant counties) must meet Enhanced Wind Resistance (EWR) criteria. While retrofitting existing homes isnt legally mandated, insurance providers increasingly require proof of wind mitigation for premium discounts. Contact your insurer to request a Wind Mitigation Inspection Form (Form OIR-B1-1802). This form evaluates features like window protection, roof attachment, and garage door strength. Completing this form not only helps you qualify for savings but also provides a checklist of what your home needs to meet modern standards. Dont assume your windows are code-compliantmany older homes were grandfathered in and remain non-compliant.
Step 3: Choose the Right Window Protection Method
There are four primary methods to tornado-proof windows: impact-resistant glass, storm shutters, laminated safety film, and plywood barriers. Each has trade-offs in cost, durability, and ease of installation.
Impact-Resistant Windows are the gold standard. These windows use laminated glass with a polyvinyl butyral (PVB) interlayer that holds shards together even when shattered. They are rated to withstand wind speeds up to 250 mph and are certified to ASTM E1886 and E1996 standards. While expensive ($500$1,200 per window), they require no post-storm installation and offer year-round benefits like noise reduction and UV protection.
Storm Shutters come in three types: roll-down, accordion, and colonial. Roll-down shutters, made of aluminum or steel, are motorized or manually operated and retract into a housing above the window. They are highly effective, durable, and offer a clean aesthetic. Accordion shutters are more affordable and easier to install but require more storage space. Colonial shutters, while visually appealing, offer less protection and are better suited for decorative use than storm defense.
Laminated Safety Film is a cost-effective retrofit solution. Applied directly to existing glass, this 8- to 12-mil polyester film holds broken glass in place and reduces penetration risk. It doesnt prevent breakage but significantly reduces injury risk and debris flow. Look for products certified to ANSI Z97.1 and CPSC 16 CFR 1201. Installation is DIY-friendly and costs $2$5 per square foot.
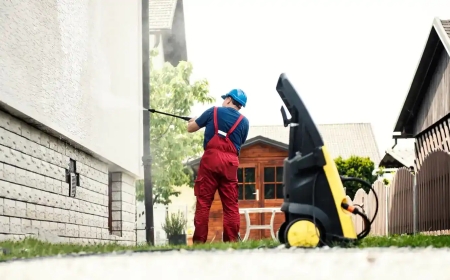
Plywood Barriers are the most accessible temporary solution. Use 5/8-inch exterior-grade plywood cut to fit window openings. Pre-drill holes and install anchor bolts or eye screws into the window frame or siding to secure the panels. While not as elegant or permanent as other options, plywood is proven in real-world storms and can be stored easily. Ensure you have enough material for all windowsthis is not a project you can wing during a storm warning.
Step 4: Measure and Order Materials
Accuracy is critical. Use a steel tape measure to record the exact width and height of each window openingnot the frame, but the glass area. For shutters and plywood, add 1 inch to each dimension to allow for overlap and secure fastening. For safety film, measure the total square footage of all windows. Order materials at least six weeks before May to account for shipping delays and installation scheduling. When purchasing impact windows or shutters, verify the products Miami-Dade County approval or ASTM certification. Avoid generic storm-ready labels without third-party testing documentation. Reputable suppliers include Andersen, PGT, and Simonton for windows; and Lutron and Amarr for shutters.
Step 5: Install Protective Systems
Installation varies by method:
Impact-Resistant Windows: Hire a licensed contractor with experience in wind-resistant installations. The process involves removing the old window, reinforcing the rough opening with treated lumber, installing a waterproof membrane, securing the new window with corrosion-resistant screws, and sealing with high-grade silicone. The contractor should provide a certificate of compliance for insurance purposes.
Storm Shutters: For roll-down and accordion shutters, follow manufacturer instructions precisely. Mount the housing unit to the wall or ceiling above the window using lag bolts into wall studs or concrete anchors. Test the mechanism manually before relying on it during a storm. For colonial shutters, attach hinges to the window casing and secure with stainless steel screws. Ensure they close flush with no gaps.
Safety Film: Clean the glass thoroughly with ammonia-free cleaner and dry completely. Peel the backing from the film and apply it wet using a spray solution of water and dish soap. Use a squeegee to remove bubbles and trim excess with a utility knife. Allow 2448 hours to cure before exposing to direct sunlight or rain.
Plywood Barriers: Cut panels to size and label each one with the corresponding window location. Install anchor points (eye bolts or brackets) into wall studs or concrete blocks, not drywall. Use 3-inch galvanized screws to attach panels to anchors. Store tools and hardware near the windows for quick access. Practice installing panels in under 15 minutes per windowthis is your emergency drill.
Step 6: Test and Maintain Your System
Dont wait until a storm is imminent to test your defenses. In March or early April, conduct a full system test. For shutters, open and close them three times to ensure smooth operation. Check for rust, loose bolts, or motor malfunctions. For safety film, inspect for bubbles, peeling, or edge lifting. For plywood, verify that all anchors are tight and that panels fit snugly. Reapply sealant around window frames if you notice air leakage. Keep a maintenance log: note dates, repairs, and materials used. This record will be invaluable for insurance claims and future upgrades.
Step 7: Prepare an Emergency Window Kit
Even with the best protections, storms can be unpredictable. Assemble an emergency kit specifically for window-related emergencies. Include: a heavy-duty utility knife, work gloves, a hammer, extra screws and anchors, duct tape, a flashlight with extra batteries, a first-aid kit, and a portable radio. Store this kit in a waterproof container near your main entryway or garage. Include printed instructions for quick installation of plywood or shutters. If you have children or elderly family members, ensure they know where the kit is and how to use basic tools. Practice your emergency response plan monthlytime is critical when a tornado warning is issued.
Best Practices
Start Early, Dont Wait for a Warning
Many homeowners delay window protection until a storm is forecasted. This is a dangerous mistake. Supply chains slow down, contractors become overwhelmed, and weather can deteriorate faster than expected. Begin your project in February or March. By mid-April, your home should be fully prepared. Tornadoes in Dallas have struck with little advance noticesome with less than 10 minutes of warning. Your preparation must be complete before the season peaks.
Protect All Windows, Including Sliding and Skylights
Its easy to focus on front and side windows, but sliding glass doors and skylights are major weak points. Sliding doors have large, uninterrupted glass surfaces and weak locking mechanisms. Reinforce them with impact film or install a sliding storm panel. Skylights are vulnerable to debris impact and pressure differentials. Install polycarbonate covers or retrofit with impact-rated skylight domes. Never assume a window is out of the wayif its glass, its a risk.
Seal Gaps and Reinforce Frames
Even the strongest glass can fail if the surrounding frame is weak. Inspect window frames for rot, warping, or loose fasteners. Replace damaged wood with pressure-treated lumber. Use expanding foam sealant to fill gaps between the frame and wall. Apply a silicone-based sealant around the perimeter to prevent water intrusion and pressure leakage. A sealed window is a stronger window.
Combine Multiple Layers of Protection
Layering defenses increases resilience. For example, install safety film on existing windows and supplement with removable plywood panels. This dual approach offers redundancy: if the film breaks, the plywood still holds. Similarly, use shutters on large windows and film on smaller ones. This strategy balances cost and protection. Dont rely on a single solutiondiversify your defense.
Coordinate with Neighbors
Community resilience saves lives. Organize a neighborhood storm-prep group to share tools, materials, and labor. Pool resources to buy bulk safety film or plywood. Establish a buddy system: check on elderly neighbors before storms. Share installation tips and emergency contacts. A connected community responds faster and more effectively than isolated households.
Update Your Homeowners Insurance
Review your policy to ensure it covers wind damage and includes replacement cost coveragenot actual cash value. Add a wind mitigation endorsement if available. Document all upgrades with photos, receipts, and certification documents. Submit these to your insurer before May to lock in potential premium discounts. In Texas, insurers are required to offer wind mitigation creditsmany homeowners save 1530% annually by proving their home is storm-ready.
Practice Your Emergency Plan
Knowing where to go during a tornado is just as important as protecting your windows. Designate a safe roompreferably an interior bathroom or closet with no windows. Practice getting there in under 30 seconds. Teach children to cover their heads with pillows or helmets. Keep emergency supplies in the safe room: water, batteries, a whistle, and a printed family contact list. Rehearse this routine every month. Muscle memory saves lives when panic sets in.
Tools and Resources
Essential Tools for Installation
Having the right tools makes installation faster, safer, and more effective. Heres what youll need:
- Steel tape measure
- Power drill with screwdriver bits
- Impact driver (for shutters and plywood)
- Level and chalk line
- Utility knife and replacement blades
- Squeegee (for safety film)
- Stud finder
- Safety goggles and work gloves
- Extension ladder (for second-story windows)
- Permanent marker for labeling
- Heavy-duty trash bags for debris
Recommended Products
Not all products are created equal. Here are industry-tested options approved by the Insurance Institute for Business & Home Safety (IBHS) and the National Storm Shelter Association:
- Impact Windows: PGT Innovations WinGuard, Andersen 400 Series StormWatch
- Roll-Down Shutters: Lutron Serena, Amarr 3000 Series
- Safety Film: 3M Safety and Security Window Film (8mil or 12mil), Huper Optik Ceramic
- Plywood: 5/8-inch CDX Exterior Grade, treated for moisture resistance
- Fasteners: 3-inch stainless steel lag screws, galvanized eye bolts, concrete anchors
- Sealants: OSI Quad Max, DAP Dynaflex Ultra
Free Online Resources
Take advantage of government and nonprofit tools designed to help Dallas homeowners:
- National Weather Service Fort Worth: Provides real-time storm alerts and historical tornado data for Dallas County.
- IBHS Wind Mitigation Guide: Free downloadable checklist for home hardening.
- FEMAs Safe Rooms for Tornadoes and Hurricanes: Technical specifications for building safe rooms.
- Texas A&M AgriLife Extension: Offers free storm prep webinars and printable guides for North Texas residents.
- Dallas Office of Emergency Management: Publishes annual storm preparedness calendars and neighborhood hazard maps.
Professional Installation Services
If DIY isnt your strength, hire certified contractors. Look for those with:
- State of Texas contractor license (TABC or TDLR)
- IBHS Certified Wind Mitigation Installer credential
- Proof of liability insurance
- Positive reviews on HomeAdvisor or Angi with photos of completed projects
Avoid door-to-door salespeople offering storm specials. Always get three written estimates and verify credentials independently.
Real Examples
Case Study 1: The Cedar Hill Homeowner Who Saved $12,000
In April 2021, a tornado passed within half a mile of a home in Cedar Hill, a Dallas suburb. The house had 14 windows, all retrofitted with 12-mil 3M safety film and supplemented with pre-cut plywood panels. While the storm shattered several panes, the film held the glass in place, preventing debris from entering the home. There was no structural damage, no water intrusion, and no injuries. The homeowners insurance claim was processed in under two weeks with full replacement coverage. Without the film, the damage would have exceeded $12,000 in repairs. The cost of the film: $850.
Case Study 2: The Frisco Family Who Avoided Disaster
A family in Frisco installed roll-down aluminum shutters on all exterior windows in March 2022. On May 17, a violent EF3 tornado touched down 2 miles away. Wind gusts reached 140 mph. The shutters remained fully closed and undamaged. Inside, the family heard the storm roar but felt no pressure changes or flying objects. The house suffered only minor siding damage. The shutters, costing $6,200 total, were credited by their insurer as a wind mitigation upgrade, reducing their annual premium by $420.
Case Study 3: The Dallas Apartment Complex That Failed
An apartment complex in East Dallas, built in 1992, had no window protection. During a May 2023 storm, multiple windows shattered, sending glass into common areas. One tenant suffered a laceration requiring stitches. Water damage spread to three floors. The property manager faced lawsuits and a 40% increase in insurance premiums. The complex had ignored a 2021 city wind code advisory. The total cost of repairs and legal fees exceeded $180,000. The lesson: neglecting window protection is not an option.
Case Study 4: The DIY Success Story
A retired teacher in Garland spent two weekends in March installing safety film on 10 windows and cutting plywood panels to fit. She used YouTube tutorials and free templates from Texas A&M. She labeled each panel, stored them with hardware in labeled bins, and practiced installation with her grandchildren. When a tornado warning was issued in late April, she secured all windows in 22 minutes. Her home remained intact. I didnt spend a fortune, she said. I just spent time wisely.
FAQs
Can I use regular glass with safety film to tornado-proof my windows?
Safety film alone does not make a window tornado-proof, but it significantly reduces injury risk by holding broken glass together. For true tornado resistance, combine film with shutters or plywood. Film is best used as a secondary layer, not a primary defense.
How much does it cost to tornado-proof all windows in a typical Dallas home?
Costs vary widely. A basic DIY approach using safety film and plywood for a 2,000-square-foot home with 12 windows can cost $1,000$1,800. Adding storm shutters increases the cost to $4,000$8,000. Full replacement with impact windows ranges from $8,000 to $20,000, depending on size and brand. Consider long-term savings: insurance discounts, avoided repairs, and peace of mind.
Do I need to replace all windows, or can I just protect the ones facing the storm?
While windows facing southwest are most vulnerable, tornadoes can change direction rapidly. Debris can come from any angle. For maximum safety, protect all exterior windows, including those on the north and east sides. Skylights and sliding doors are especially high-risk and must be included.
How long does safety film last?
High-quality safety film lasts 1015 years under normal conditions. Exposure to direct sunlight and extreme heat can degrade the adhesive. Inspect annually for peeling or bubbling. Reapply if the film loses clarity or adhesion.
Can I install shutters myself?
Yes, if youre comfortable with power tools and measuring. Roll-down and accordion shutters come with detailed instructions. However, improper installation can lead to failure under stress. If youre unsure, hire a certified installer. Your safety is worth the investment.
Will my homeowners insurance cover window damage if I didnt tornado-proof them?
Yes, most policies cover wind damage regardless of preparation. However, without wind mitigation upgrades, your premiums may be higher, and your claim payout may be reduced if the insurer determines the damage was preventable. Proof of protection can also speed up claims processing.
Whats the fastest way to protect windows if a tornado warning is issued?
Use your pre-cut plywood panels and pre-installed anchors. If you dont have them, cover windows with heavy blankets, mattresses, or thick cardboard secured with duct tape. This is a last-resort measureit wont stop debris but can reduce injury risk. Always prioritize getting to your safe room immediately.
Are there tax credits or rebates for tornado-proof windows in Dallas?
As of 2024, Texas does not offer state-level tax credits for storm-proofing. However, some local utilities and nonprofits provide rebates for energy-efficient impact windows. Check with Dallas Water Utilities or the North Texas Energy Efficiency Alliance. Federal tax credits may apply if the windows meet ENERGY STAR standards.
Conclusion
Tornado-proofing your windows in Dallas before May is not an optional home improvementits a non-negotiable act of self-preservation. The storms dont wait for convenience. They strike when the air is thick, the sky turns green, and the sirens scream. Your windows are your homes weakest point, but they dont have to be your downfall. By following this guidefrom assessment to installation to maintenanceyou transform vulnerability into resilience. You protect not just your property, but the people who sleep behind those panes of glass. The cost of preparation is a fraction of the cost of regret. Start today. Measure tomorrow. Install by April. When May arrives, you wont be hoping for the bestyoull be ready for anything. In the heart of Tornado Alley, knowledge is your shield, preparation is your armor, and action is your only guarantee of safety.